

Lloyd awakens to find himself, with the rest of the party, and Colette, inside the Sylvarant Base he was previously imprisoned at. The ones that saved them from Yggdrasill are not Desians at all, but in fact, a group opposed to them called the Renegades. As everyone reflects on Kratos' betrayal and all that has happened, a soldier enters and takes you to meet with the Renegade's leader. Their leader happens to be the same man that tried to assassinate Kratos in Hima. He and Botta explain that they are an organization that is opposed to Cruxis and the Desians, and their goal is to prevent the revival of the Goddess Martel; hence why they were trying to kill Colette and Kratos. They reveal Yggdrasill created the two worlds of Sylvarant and Tethe'alla and their constant struggle for mana in an attempt to create Chosens and find the perfect vessel for Martel. However, for some reason, the Renegades no longer need the Chosen, but Lloyd! The Renegades encircled the group, but Lloyd manages to repel the already-wounded Yuan and the party escapes out into the hall.


The same enemies, only stronger this time, still roam the Sylvarant Base. There is one new addition, however, the Evil Warrior. Make sure to add them to your Monster List. Also very important, even though you will face these enemies again later on, is that you obtain the Foot Soldier and Evil Warrior's stolen item for the Monster List with Colette now. The next, and final, time you see these enemies, Colette will not be available to steal from them and you won't be able to complete their entries.


Outside of Yuan's room, the exit to the south is blocked, so use the stairs to the upper-right. On this catwalk is a minor item shop and a save point. Beyond there is a puzzle room. It's very important that you pay attention to the upcoming directions as a lot of players lose their 100% treasure count, and the Treasure Hunter title, in this very room. Activate the Sorcerer's Ring altar in the center of the room to change the effect to the ball of lightning from your previous visit here, then climb the left-side stairs and over to the lower-portion of the room. There are two moveable blocks in the room: position them as in the screenshot above and use them as a bridge to access the stone block on the solitary platform; which you should push off.


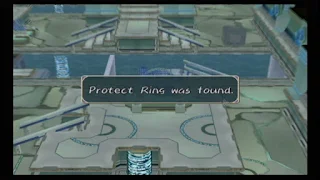
Down the stairs, push the stone block on your right down into the water, then use the Sorcerer's Ring to charge the pillar to the upper-left. Activate the nearby control panel to drop the platform above that, with the blocks positioned correctly, forms a bridge to the other side. Move around to the bottom of the room and charge the pillar there, then use the control panel in the center of the room to drain the water. Directly behind the bluish control panel, on the ground floor, search for a hidden chest with a Protect Ring in it. This one-of-a-kind accessory reduces physical damage received, but at the expense of making the character weak against all elemental magic. It absolutely has its use, but only in certain situations. Once you have the Protect Ring, descend the stairs nearby and push the stone block on the blue switch to lower the barrier, then shock the pillar to open the exit to the south.


To finish the dungeon, exit to the north of the forked room. Raine, instinctively, I guess, pushes a bunch of buttons on the control panel and the Rheairds rise from below. The party then sets flight for Tethe'alla. Upon arriving, however, the already-declining mana in the new world is not enough to sustain the fuel of the Rheairds and the party crashes into an area known as the Fooji Mountains. Having crashed, the only way we're going to be able to use the Rheairds again is for Sheena to forge a pact with the Summon Spirit, Volt. After some conversation on the Tower of Salvation and the similarities between the two worlds, you'll be in control to descend the mountain.
A slew of new skits become available in the Fooji Mountains. They are: "Don't Give Up", "I'm a Hypocrite", "Flying", "Angel Yggdrasill", "Tethe'alla's Chosen", "Kratos, Our Enemy", and "They're Elves".
New Monsters in the Fooji Mountains: Night Raid, Black Bat, Hare, Egg Bear
The Fooji Mountains are reminisce of the Ossa Trail. Since we can't return to Sylvarant for quite a while, this will be a hunting ground for Beast Hides and Fangs. Colette can steal Hides from Hares and Fangs from the giant Egg Bears. Black Bats will also sometimes drop Fine Pellets for using to make figurines, but we'll find a much better location to farm these later. Note: The Fooji Mountains change their monster encounters not too long from now, but all the available enemies here will still be found on the world map outside the dungeon so they aren't missable.

This dungeon is extremely linear, with no deviation from the path's descent until you reach the bottom. Along the way, look for chests with an EX Gem Lv2 and the new Cool Orbit weapon for Genis.

Sheena suggests we visit to the nearby city of Meltokio, so that will be our destination. There are a few things to cover around the Meltokio area of the world map, but we'll receive two new party members in the city, so we'll explore afterward. For now, look for new skits: "Angry Noishe" and "Lloyd Confesses His Love" before we enter Meltokio to the north of the Fooji Mountains.


Climbing the stairs to the north of the city, the lifeless Colette bumps into a frilly, red-haired guy and his band of groupies. The "hunnies" berate Colette for wearing an angel "costume" and Lloyd and Genis join in with the insults. The red-haired louse, Zelos, tries to make nice with Colette but she throws him away with ease! Raine comments that his reflexes give him away as an Exsphere user. This Zelos guy is, apparently, famous in these parts, and after a stale apology, he and his groupies depart. Afterward, there are shops on both sides of the square, but we'll come back.


Return to the courtyard and talk to the guards at the gates of the Castle. They'll, basically, tell Lloyd and his group to get lost and that the King is ill and not accepting visitors. Lloyd, failing to mention anything about having a Letter from Sheena, will have to try over at the Church of Martel, that is just to the left of the courtyard. Speak with the priest inside and a small, pink-haired girl enters with the sacred wood in preparation for prayers for the King's health in his chambers. Follow her outside to find her speaking with a guy named Vharley, The party asks the girl, Presea, if they can help her deliver the sacred wood to the castle. Almost lifeless like Colette, Presea ignores the request, and continues to the Castle. The party stops her again; this time explaining the desperate situation. Presea agrees to their help in carrying the sacred wood, but when Lloyd and Genis, both with Expheres like Presea, can't manage to even move it an inch, she drags it off toward the Castle by herself!


The King and Pope knowing they are from Sylvarant, the group senses trouble and begin to devise a way for the innocent Presea to escape from the Castle. Suddenly, with weapons drawn, Zelos, the Pope, and his guards swarm the room and go after Colette; but she easily rebukes them! The Pope, fearing Colette will complete the angel transformation, and thus the decline of Tethe'alla (I thought that was already happening with the drop of mana in the air needed to power the Rheairds?) can't let her escape. Raine steps in and proposes that the two groups form a truce. The party from Sylvarant is not interested in Colette completing the transformation, and in fact, wants to free her from it. Of course, in theory, this will abandon Sylvarant, as well, but helping Colette is the most important thing right now. Lloyd will then be given a choice as to whether he agrees with this or not. Responding: "All right. That's fine." increases affection with Colette, Raine, and Zelos, but lowers it with Genis and Presea. Saying: "No, we can't do that." provides a small boost for Colette, and improved affection for Genis and Presea, but drops Raine and Zelos' values.
Note: Zelos' affection is of utmost importance to completing the Collector's Book. He, along with Colette and Kratos, provide you with a unique item if he becomes Lloyd's "soulmate" later in the game. That said, Zelos tells the Pope that he will travel with them and keep tabs on their activities as they try to find a way to free Colette from her fate and the Pope relents. Zelos leaves to speak with the King and requests that Lloyd meet him in the Chuch of Martel later. Over at the Church, Zelos officially joins your party and "introduces" himself to the ladies. Our next destination is the Imperial Research Academy in the town of Sybak, and with Presea's home of Ozette nearby, she'll be coming along with us.
Zelos, battle-wise, is nearly identical to Kratos; sharing all techs (With Kratos having one additional) and equipment. However, their statistical growth and titles are not shared. Equip Zelos with Kratos' old Silver Sword and Cleric's Hat, and I am using the Rabbit's Foot and Leather Boots as his accessories. He, also, comes pre-equipped with the second of only two Stiletto weapons in the game. With our two new party members, let's now visit the stores we passed over earlier.

The weapon and customization shops are on the western-side of town, from the square the party initially met Zelos. Behind the counter is a maneki-neko, or Lucky Cat, that turns into the Wonder Chef! He teaches the party the Steak recipe this time. Steak removes the Paralysis effect when cooked.


The only thing we need from the weapon shop is a Ray Thrust for Colette to equip. If you're not keen on using a small amount of Grade for some Brass, you may consider buying an Ogre Sword for Lloyd, too.


On the far-eastern end of the square sits the armor shop. Purchase two Splint Mails for Lloyd and Zelos, Elven Protectors for Colette and Presea, and a Misty Robe for either Raine or Sheena when she returns to the party. Buy a Striped Ribbon for your inventory, since for whatever reason, it's not better than the Tartan Ribbon you already have, and an Omega Shield. Make your own decision whether it is a better choice than the Red Shield, but personally, I am switching back to the Omega Shield. Claw Gauntlets are amazing for Lloyd and Presea; providing an additional +50 attack power! Needless to say, we're going to have this equipped for some time. Zelos can equiped this, as well, so again, come to your own conclusions based on your personal preferences. Lastly, there are Heavy Boots accessories, which look nice, but drop your movement speed and prevent you from jumping and backstepping during battles. You may think this doesn't matter much for Raine and Genis, however, keep in mind that they need to flee once an enemy gets near them. Myself, personally, I buy one for my inventory and stick with the Leather Boots for my characters.
Zelos comes with a very unique Lv2 Personal EX Skill we need to go a bit in-depth on. When equipped, and Zelos is your on-screen character, talking to any female, regardless of age, will result in an item picked from a pool. The quality of the item is determined by how high Zelos' current Luck statistic is, so equipping two Rabbit's Foot accessories is helpful in this regard. Unfortunately, each time he talks to a "hunny" his Luck is randomized, like staying at an inn, so you won't be able to manipulate his Luck to remain high. The best part about this is: you can do it indefinitely! All you need to do is exit back to the world map, then reenter the area, and Zelos can hound his "hunnies" again for more free stuff. Something to keep in mind is that some female NPCs, for example, the one running the Coliseum desk and the Elemental Research Lab, need to be talked to from behind their desks to get their item.
There's another aspect tied to this, as well. To receive a title, Zelos needs to speak to every female in both worlds. This is quite daunting considering there's no way to know who he has and hasn't spoken with. Fortunately, as we continue to make our way through the game, I'll be covering the number of available "hunnies" he needs to talk with. It's easier is you just run through the areas and talk to everyone with Zelos, but for the sake of completion, I'll provide an exact number for you.
Note: If you're planning on Zelos becoming Lloyd's "soulmate", trying for the title is an absolute waste of time due to the circumstances it creates. You can still receive the title, however, due to an error in the game; which you can do whether Zelos is a "soulmate" or not. Most will choose the latter, which I will cover when the time comes, but for those that want to gain the title legitimately, I'll have everything covered.
Zelos' "Hunny" Count in Meltokio: 33 (Two more available later on)
Pool of Items from Zelos' "Personal" EX Skill:
- Food: Miso, Rice, Pasta, Cabbage, Apple, Peach, Melon, Pear, Tomato, Snapper, Banana, Cucumber, Bell Pepper, Koniac, Mushroom, Panyan, Barley Rice, Seaweed, Milk, Juicy Meat, Radish, Potato, Red Satay, Black Satay, Purple Satay
- Gels: Apple, Orange, Melange, Lemon, Pineapple, Miracle
- Bottles: Panacea, Life, Holy, Dark, Rune
- Ect.: Small amounts of Gald, Pellets, Fine Pellets, Rare Pellets, Super Pellets, Energy Tablets, Hourglass
This isn't an exhaustive list, but those I have found. Of particular note, besides the Pellet types, are Energy Tablets, Rune Bottles, and Hourglasses that can never be purchased anywhere. In regards to Hourglasses, this is one of only two ways to get one; and the other is a crap-shoot at best. If you're planning to pick Kratos over Zelos later on, make sure you take advantage of this as soon as possible to stock up on Hourglasses. Picking up these free items is a great money maker, as well. Energy Tablets sell for 2000 Gald, with Miracle Gels and Rune Bottles selling for over 1000, and with high Luck, they are very common. To speed up the farming process, set Lloyd's Lv2 EX Skill to Personal, also, to get around to the "hunnies" quicker.
Note: The two "hunnies" inside the room on the second floor of the inn are actually missable, however, they do not disappear until the very end of the game, so you have plenty of time to talk to them.

Before leaving, swing by the inn and stay the night for the skit "Intellectual Hunnies". More skits appear on the world map: "Presea's Job" and "Hunnies of the World".

Zelos' Titles
Magic Swordsman: Character's default title with no statistical gain.
Gleaming Knight: Zelos gains this title at level 40. (HP: 30%, TP, Str: 20%, Int: 10%)
Elegant Swordsman: Zelos gains this title at level 100. (HP, Def: 100%)Tetra Slash: Same as Lloyd and Kratos' title. In control of Zelos, get into a battle
and have him perform his basic, three-hit normal attack, then follow it
up immediately with a tech like Demon Fang. (HP, Str: 20%)
Casanova: Simply form a party of Zelos, Colette, Raine, and Presea and win a battle. As long as three females fight alongside him, Zelos gains the title after the battle. (Def, Int, Eva: 20%)
Commander-in-Chief: This is, essentially, just like Lloyd's Lone General title, but the status of the party isn't important. In control of Zelos, change the party's orders with the up, left, or right buttons on
the directional pad. You need to do this a total of four times. The important thing is, for it to count, Zelos needs to finish his voiceover for the command before issuing the
next. (Int: 30%, TP: 10%)
Loudmouth: For this one, control Zelos and set your entire party's Strategy to "Hold Position". To receive the title, Zelos needs to perform actions that require a voiceover to play. You can use techs, items, change battle orders, escape/cancel; anything works. A total of 50 need to be preformed in one battle for it to be rewarded afterward. (Int: 30%, Eva, Acc: 20%)

Presea's Titles
Taciturn Girl: Character's default title with no statistical gain.
Axman: Presea gains this title at level 40. (Def: 30%, HP: 20%, TP: 10%)
Bursting Girl: Presea gains this title at level 100. (HP, Str: 100%) Lone Girl: Complete a battle with a party of Presea, Lloyd, Genis, and Zelos. As long as she is the sole female member of the party, Presea will receive the title after the battle is completed. (Def, Int, Eva: 20%)
Fragile Shield: First, make sure Presea doesn't have the EX Skill Rear Guard equipped. Then, control Presea for the upcoming battle and set the party's Strategy to "Hold Position". In battle, simply have Presea guard and let the enemies attack her. Continue to guard, and eventually a guard break will occur. The enemies need to break Presea's guard 10 times in one battle to obtain the title. Make sure Raine or Zelos are in your party to cast First Aid, just in case. (Def: 30%, HP: 20%)
Hunter: For this title, control Presea, then encounter and defeat the same monster five times in a row. The easiest way to do this, in my opinion, is to fight battles on the beaches outside Meltokio. The small monster icon always contain a Seaspin. At the end of the fifth straight battle, that included the same enemy in each one, Presea acquires the title. (Str: 30%, Acc: 20%)
Note: Unlike the other characters, Presea actually has two of the "Combo! Lloyd and Character" skits when she edges out the other characters in affection for him.
New Monsters in the Meltokio area: Rogue (Roads), Seaspin, Super Star (Beaches)


For an extra, missable scene, climb back to the top of the Fooji Mountains now that Zelos has joined. Interestingly, he knows all about the existence of Rheairds.


Directly northeast of the Guidepost Monument is a House of Guidance; Tethe'alla's version of the House of Salvation. There are females for Zelos to talk to here, as well as a merchant that exchanges Grade for customization materials. Don't get excited about seeing the Metal Sphere, though, because due to a bug, if you purchase one, it doesn't actually get added into your inventory; the rest of the options work as intended, including the Grab Bag that contains the same rewards as the ones in Sylvarant. If you didn't want to spend the Gald on an Ogre Sword, pick up a Brass and take it back to Meltokio to create one. For the next town, take one Brass with you.
Note: With access to Rune Bottles, if you snag Guardian Symbols from the Grab Bag, you can use them to obtain the excellent +10% Strength Warrior Symbol accessory. You won't be able to obtain more than one of these until the end of the game.
Zelos' "Hunny" Count at the Meltokio House of Guidance: 2


At the Grand Tethe'alla Bridge, the party is exposed to a grotesque reality: the bridge is actually made out of 3000 Exspheres! Zelos seems completely oblivious to the fact that the creation of Exspheres means the destruction of a human life. After a discussion on Exspheres, talk to the male NPC nearby for another scene with Zelos, then begin the long-winded trip across the Bridge. On the first screen off the Meltokio side, you'll see a Katz gazing out onto the ocean. Talking to him and trying his mini-game quickly reveals that he is a fiendish, torturous Katz! Seriously: You're gonna hate this kid. Thankfully, we can ignore him until the end of the game! So, carry on...
Along the Bridge you'll encountered a multitude of skits including: "Nicknames", "Ozette and Colette", "Happiness Charms", and "Sharp-nosed Spotted Jerboa". Exiting back to the world map on the far-side, look for two more skits: "Similar" and "Tethe'alla's Architectural Technology". On the Sybak side, there are no new treasures or monsters, so journey north and enter the academic town of Sybak.